A 2D profile can be traced from a digital photograph by placing the photograph in the background of one of the 2D Views in the Structure window. In this example, the profile of a car will be created by tracing it from a side view photograph of the car. Following that, wheels will be added to the profile using the Drawing Assistant .
Execute Project | New Project and create a new Project file
Execute File | New | Structure in the ME'scope window to open a new (empty) Structure window
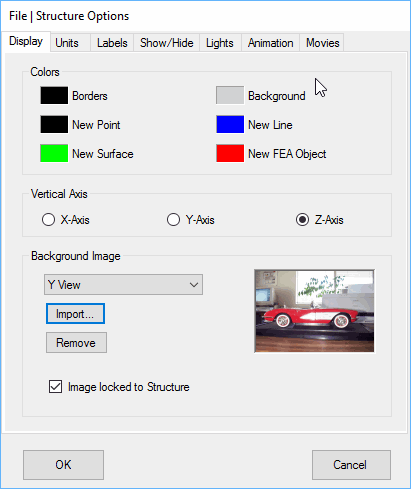
Execute File | Structure Options in the Structure window to open the Structure Options box
On the Display tab,
Choose Y View, as shown below
Click on the Import button, select JPG in the file extension list, and open VETTE55.JPG from the ME'scope \ Tutorials folder
Click on OK to close the Options box
Display the Y View in the Structure window
A car profile should be in the background of the Y-View, as shown below.
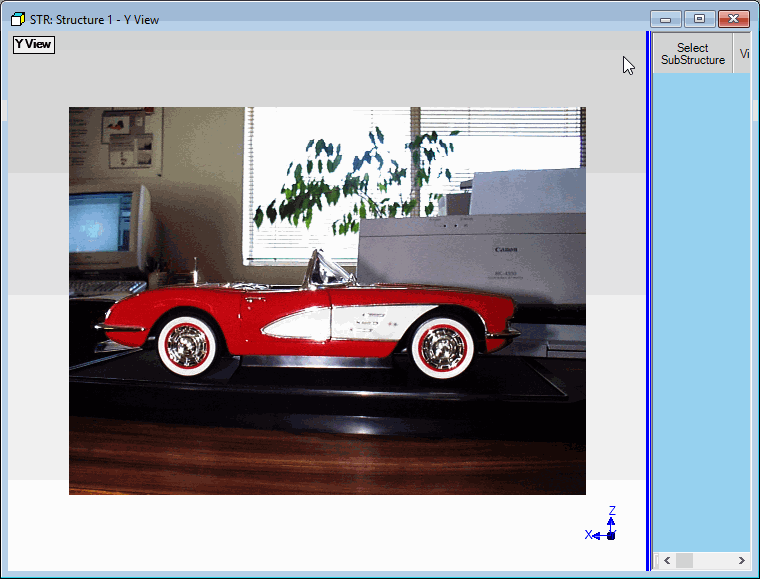
Structure Window Showing Corvette Photo as Background.
Maximize the Structure window, and drag the spreadsheet splitter bar to the right
Choose Points ![]() in the Edit | Current Objects list
in the Edit | Current Objects list
Execute Edit | Add Object ![]() to enable the Add Points operation
to enable the Add Points operation
Move the mouse pointer into the Y View, and click on the edge of the red body to add a Point
Continue clicking along the edge of the red body to add as many profile Points as desired.
When you have completed the profile, execute Edit | Add Object ![]() again to terminate the Add Points operation
again to terminate the Add Points operation
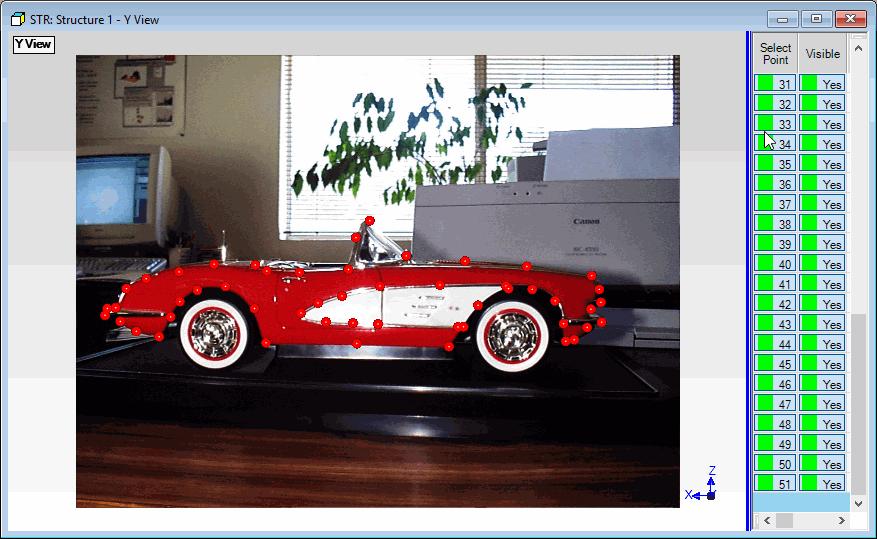
Y View Showing Points Added to Define the Car Profile.
After all of the Points are added form the profile, the background picture can be removed from the Y View.
Execute File | Structure Options to open the Structure Options box
On the Display tab, select the Y View, and press the Remove button.
Now you can proceed to add Lines and/or Surface to the profile before extruding or revolving it into a 3D model
Choose Lines ![]() from the Edit | Current Objects list
from the Edit | Current Objects list
Execute Edit | Add Objects ![]() to enable the Add Lines operation
to enable the Add Lines operation
Click near a Profile Point to select it
Click near an adjacent Point to add a new Line between the two Points
Repeat the two steps above until all desired Lines are added to the car Profile
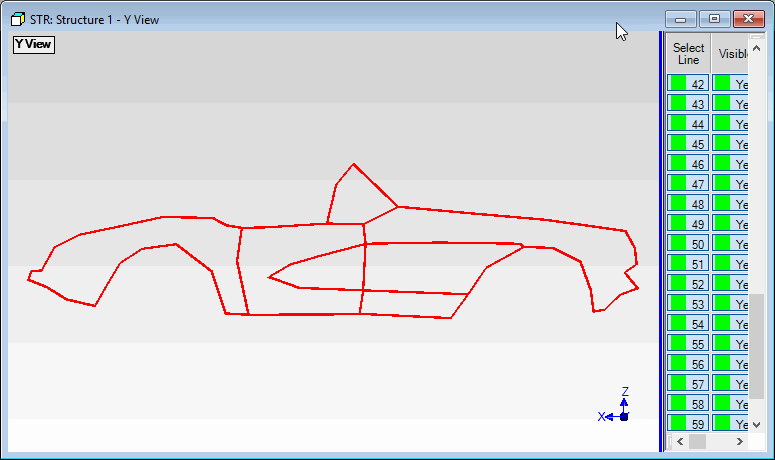
Completed Car Body Profile.
Execute File | New | Structure in the ME'scope window to open a new Structure window
Execute Draw | Drawing Assistant to display the Drawing Assistant tabs
On the SubStructure tab,
Double click on the Editable Circle
On the Position tab,
Rotate the SubStructure about the Z-axis so that it is "facing" the Y-axis
On the Dimensions tab,
Enter the parameters shown in the figure below
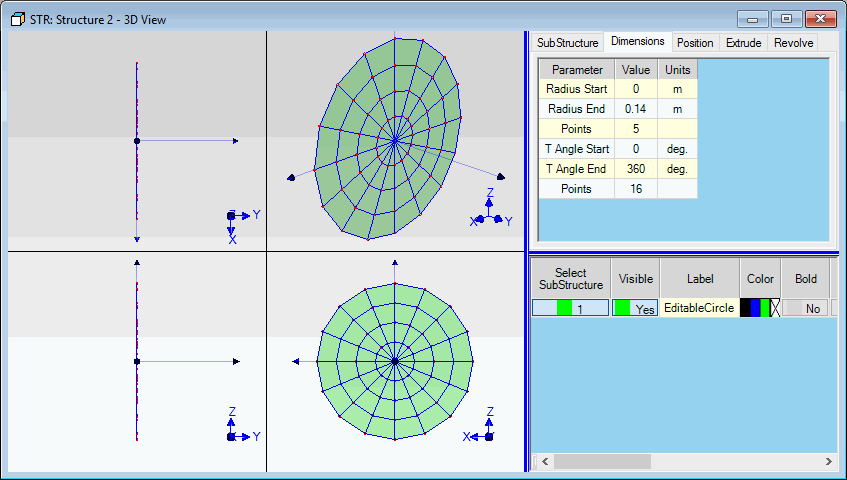
Wheel SubStructure.
In the Structure window containing the car profile, execute Edit | Paste Objects from File
In the dialog box that opens, choose the Structure window with the wheel in it, and click on Paste
Execute Edit | Drag Selected Objects, and drag the wheel into the front wheel opening in the profile
Edit | Paste Objects from File again, but this time choose the Structure window with the profile in it, and click on Paste
The selected SubStructure (Editable Circle) is pasted into the profile as a second copy of the wheel SubStructure
Execute Edit | Drag Selected Objects again, and drag the second copy SubStructure into the rear wheel opening, as shown below.
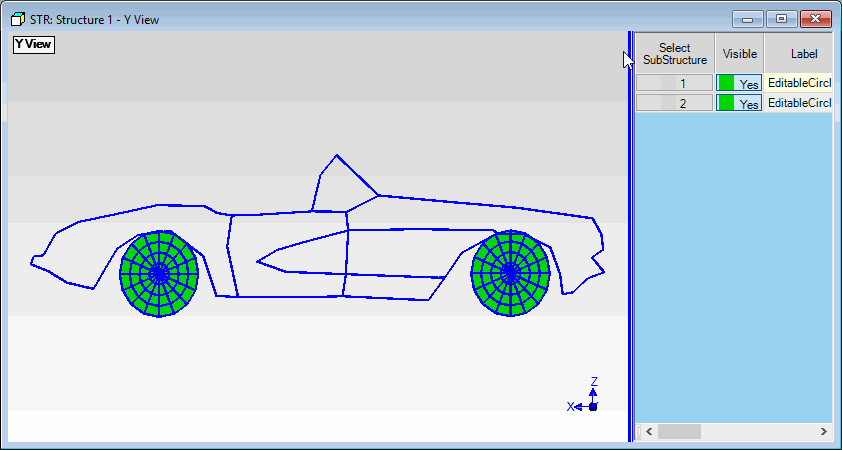
Car Profile With Wheels.